
Chisel is the open source tunneling tool witten in Golang. The fast TCP/UDP tunnel, transported over HTTP, secured via SSH. Chisel uses single executable including both client and server and creates a SOCKS-compliant proxy. So that means once Chisel server/client tunneling has been setup, we can use proxychains to access the internal server which is not accessible from the external. In this article, I will start from installation and demonstrate a few scenarios. Let’s start from the installation.
Installation / Compilation
Since Chisel is written in Golang. Firstly we have to install Golang on our Kali system. Please type the following command to install Chisel
# apt-get install golang
Once Golang is good to go, go to Chisel Github repo and clone it to local, then we can use go build to build Chisel.
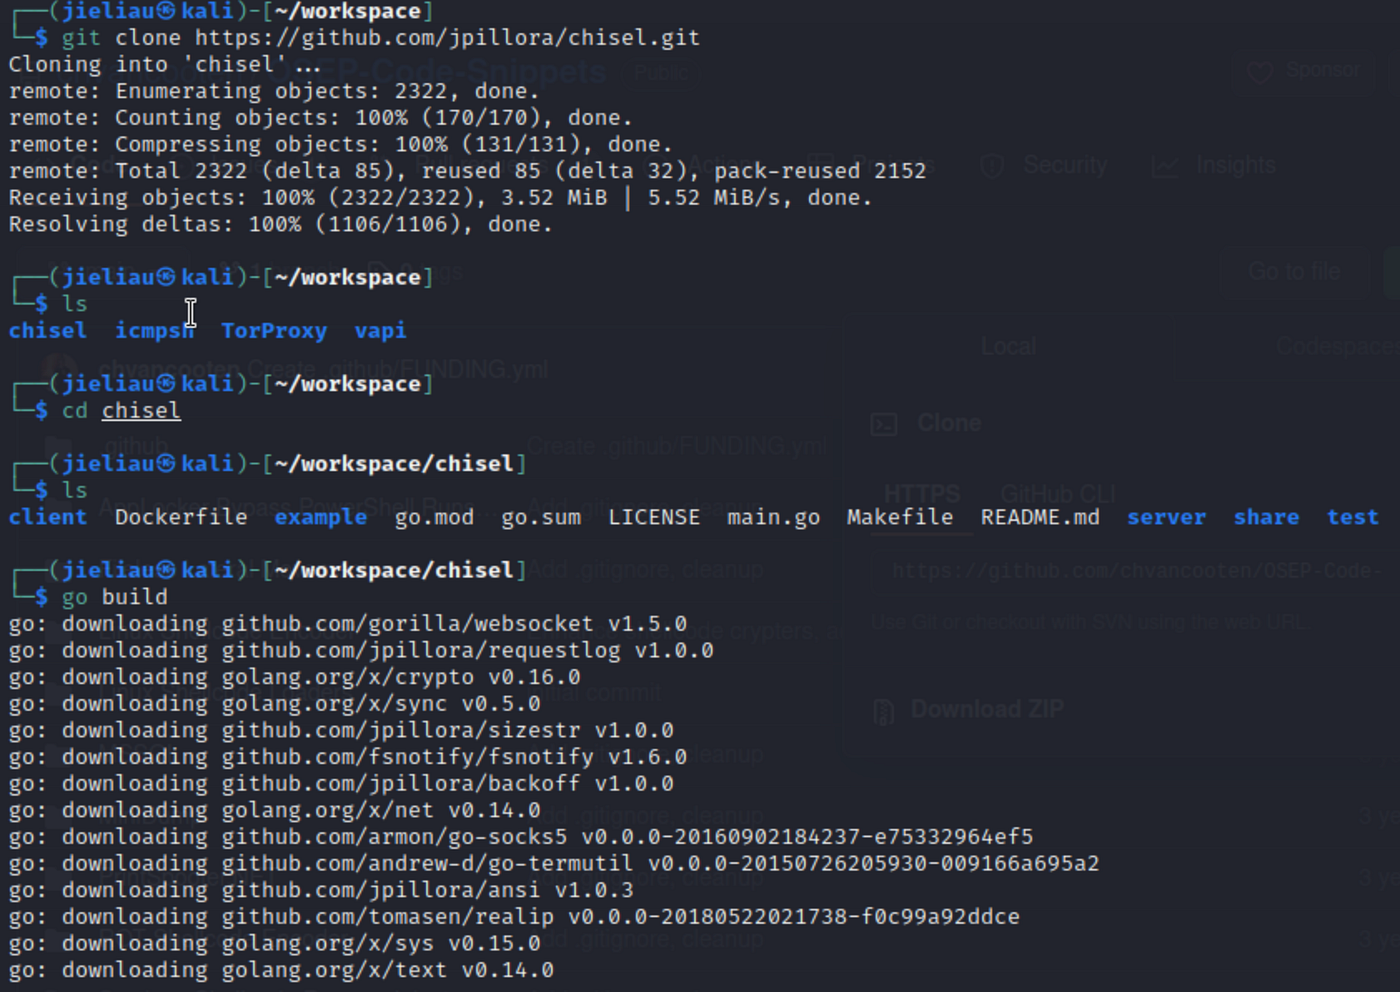
We can also setup Golang env variable to build Chisel binary run on Windows platform. Please see the following screenshot.

At the moment, all our Chisel executable is ready to go.
Testing Scenarios
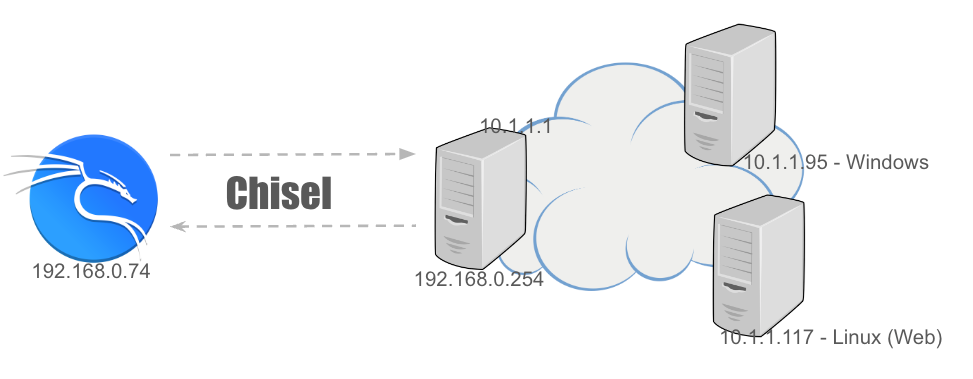
In all scenarios, we will assume we already compromised one host which is accessible from external network (192.168.0.0/24) and also has the connection to internal network (10.1.1.0/24). The hosts inside the internal network are unable to access the external networks and internet. Please see the following diagram.
Working as Proxy from Internal
The first scenario is once we are on 192.168.0.254, we assume this host is unable to access the web site on the internet. The first step is to execute Chisel as server on Kali.

Then we jump to 192.168.0.254 and execute the following command to establish the tunnel with Kali and open up one port:5555 that will forward the web traffic via Kali to reach the web site on the internet. Please check the following screenshot.


Working as Proxy from External
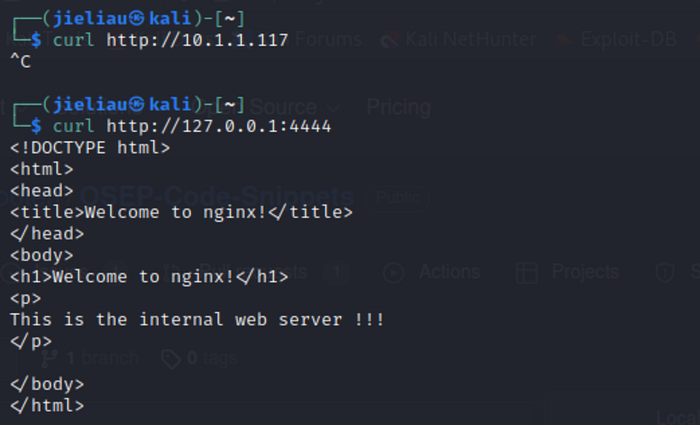
The second scenario is since the internal network is not available from external network, that means before tunnel being setup, Kali is unable to access the Linux web server (10.1.1.117).
And then we can setup the tunnel between Kali and 192.168.0.254, after this, our Kali can easily access the internal web server. Please see the following screenshot.


Using Proxychains to Scan Internal Network
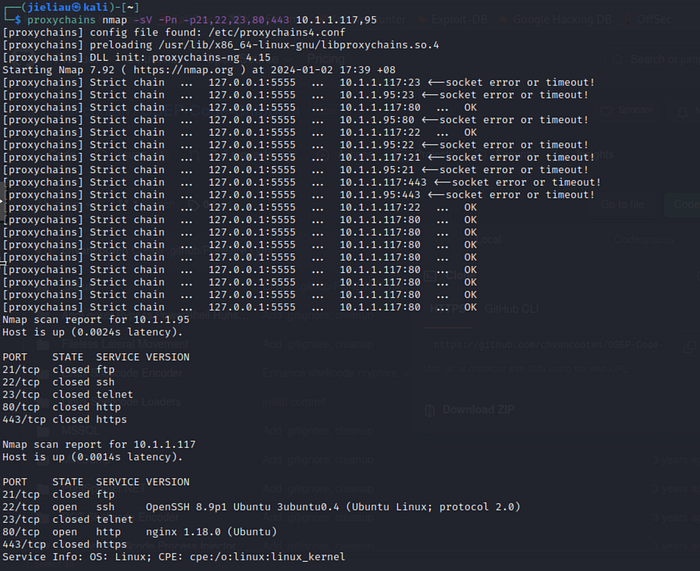
The third scenario is to let 192.168.0.254 work as sock proxy, so we can use proxychains to scan the whole internal network. Please check the following screenshot.


Once tunnel has been setup, we have to configure our proxychains. Please edit the /etc/proxychains4.conf file.
# vim /etc/proxychains4.conf
…
[ProxyList]
socks5 127.0.0.1 5555
Now, we can use nmap along with proxychians to scan the whole internal network or one specific host.
2 Internal Networks Scenario
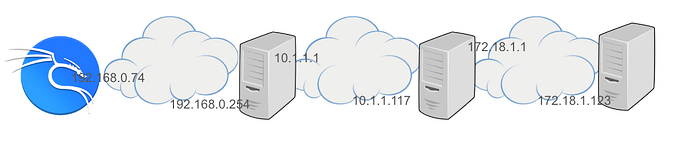
The fourth scenario I would like to demonstrate is that now we have 2 internal networks, 10.1.1.0/24 and 172.18.1.0/24 respectively. 192.168.0.0/24 is unable to access 172.18.1.0/24 network. We can use multi-tier Chisel to overcome this obstacle. Please check the diagram below first.
The first step is to enable Chisel sever on 192.168.0.254/10.1.1.1, and on 10.1.1.117/172.18.1.1, we use Chisel as client connecting back to 192.168.0.254/10.1.1.1.


After this, we go to our Kali and initiate one another Chisel server. And then we go back to 192.168.0.254/10.1.1.1 to use Chisel client to connect to Kali.


And we have to edit /etc/proxychains4.conf to add the needed item.
# vim /etc/proxychains4.conf
…
[ProxyList]
socks5 127.0.0.1 1111
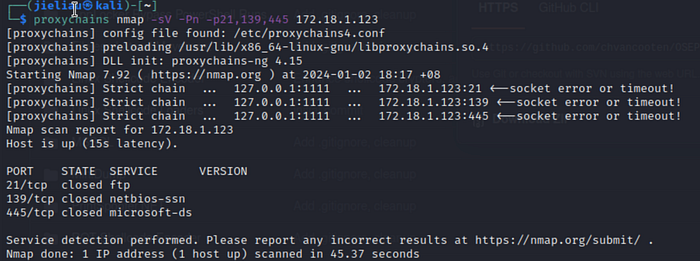
Now, our Kali is able to access 172.18.1.0/24 network via 10.1.1.0/24.
Conclusion
Chisel is really an excellent tool for your lateral movement. Once you compromise one host, it’s really good to you to pivot from host to host internally. I hope you enjoy the article today and wish this helps you in any way. Happy hacking.
